


1:55 AM How to Install a Steam Generator at Home | |
Adding a steam generator to your home can deliver spa-like steam sessions for wellness, comfort, and relaxation. However, a successful install depends on getting several fundamentals right—especially electrical requirements, water supply/plumbing layout, and proper ventilation.
Before you start, verify your generator’s specific installation manual and local building codes. Steam systems are sensitive to water quality, pipe sizing, and safe condensation management, so following the manufacturer’s instructions is not optional. Plan the location and steam room layout
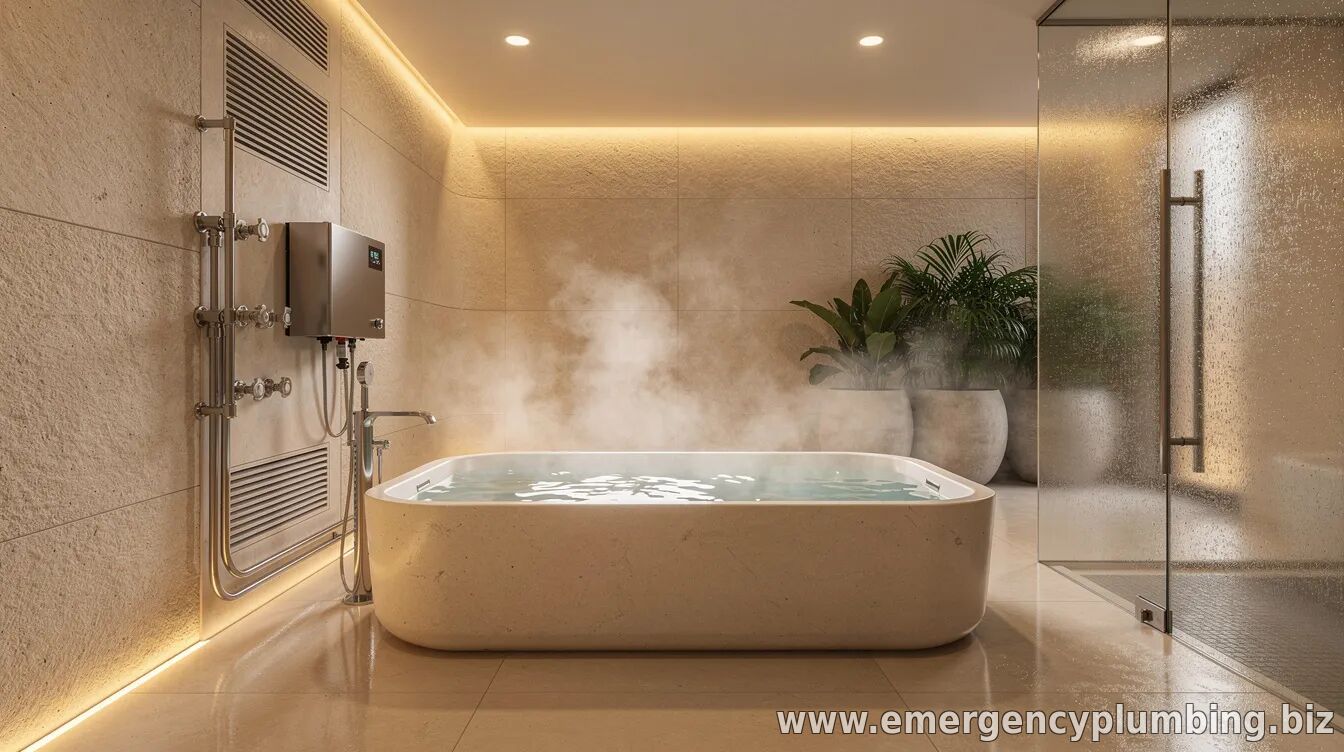
Choose where the steam generator will live—typically in a nearby utility space—so steam piping can run efficiently to the steam room. Consider access for service, noise levels, and moisture protection around all components. The steam room should be properly sealed and insulated to reduce heat loss and prevent steam escaping into adjacent areas. Address electrical and GFCI/RCD safety early
Steam generators often require dedicated electrical circuits sized for the unit’s power rating. Most installations must include appropriate protection such as a GFCI/RCD where required by code and local standards. If you’re not fully confident with electrical work, hire a licensed electrician—mistakes here can be hazardous and can void warranties. Set up water supply, drain, and water quality
The water inlet must match the generator’s requirements (hot or cold feed depending on the model). Many systems also need a properly sized drain to remove condensate and prevent scale buildup. Hard water can shorten the life of heating elements, so confirm whether the unit recommends filtration, descaling, or a water conditioner. Install steam piping and condensate control
Correct steam line routing matters. The piping should be installed to minimize heat loss and avoid low points where condensate can collect. Many manufacturers specify slope, insulation type, and the use of steam traps or condensate management features. Following these details helps maintain consistent steam output and reduces premature wear. Ensure ventilation and proper sealing
Even in a sealed steam room, ventilation is important for air quality, comfort, and moisture control outside the steam environment. A well-designed exhaust strategy helps prevent unwanted condensation in walls and ceilings. Pair ventilation with high-quality vapor barriers and waterproofing for the steam enclosure. Configure controls and safety features
Temperature sensors, timers, and control panels should be installed according to the manual’s wiring diagram. Confirm that emergency shutoff provisions and any manufacturer-required safety interlocks are in place. If your system supports features like aromatherapy or additional accessories, verify compatibility before wiring.
After installation, complete a commissioning run: leak check the water connections, verify correct electrical operation, and test steam output under controlled conditions. Watch for unusual noises, slow heating, error codes, or signs of moisture where it shouldn’t be. Running the system with the manual’s recommended startup procedure can also help flush initial water lines and ensure proper drainage.
For many homeowners, the fastest path to “ultimate relaxation” is pairing careful DIY preparation with professional help for high-risk steps like electrical connections, waterproofing sign-off, and final commissioning. When done correctly, a steam generator can provide consistent, efficient steam sessions while keeping your home safer and drier.
| |
⏰ Dispatcher support 24/7
📞 224-754-1984CALL ☎ Subscribe 👆 FORUM 🗣
North Shore, Northwest suburbs of Chicago, IL
Next & Previous posts
| Total comments: 0 | |